Saturday, January 11, 2020

December Kit share - My Creative Scrapbook Kit Club/main Kit

Hey my friends....Happy new year!! I realize this post is a little late, but I have been spending time with my family and working on new content for my YouTube channel!
Below are just three projects I created with the December Main Kit from My Creative Scrapbook.  I had a great time working on these, but they will be my last.
I have decided to step down from the design team to focus on other projects and goals.
It has been a wonderful experience and an incredible honor!
 
I hope you enjoy these projects as much as I enjoyed making them!


Monday, December 2, 2019

My Creative Scrapbook Kit Club - November Main Kit Layout Share

Hey, crafty friends..I have layouts to share using the My Creative Scrapbook Kit Club November Main Kit filled with the Simple Stories "Autumn Splendor" collection!
This collection has beautiful plaids, and deep fall shades of pumpkins, leaves, and all things Autumn...which is my fave time of the year!!


Thanks so much for taking a look! I hope you were inspired to create a similar look with your kit!
Have a crafty week! Happy Holidays!
Hugs, Heather

Sunday, November 10, 2019

My Creative Scrapbook Kit Club- October Main Kit


Hey, friends....I have some fun layouts to share using the My Creative Scrapbook October Main Kit!
I know this post is a little late, but with the holidays, recent and upcoming, I have been a little behind it seems!
This kit was beautiful! It was filled with Pink Paislee, Paige Evans Truly Grateful collection and one of my favorite collections all year long!  Well, anything with purple and pumpkins works for me!!
 
I created  (5) layouts with this kit and had so much fun with these products!
The first layout, "Make Your Own Magic", includes some fun mixed media techniques which I share in my YouTube process video (link below).


My 2nd layout is probably my favorite of all!  I incorporated exclusive cut files and hand stitching, plus a little colorful mixed media.  Check out my process in the YouTube video (linked below)!


My other three layouts do not have process videos, but you can see so many gorgeous details in the pics below! 


For more information, head over to My Creative Scrapbook or my Instagram page!
Thanks for stopping by!  Hope you are having a great day!

Sunday, October 27, 2019

(17) different looks for (1) background die - Card techniques

Hey crafty friends!  I was asked to fill in on this fabulous day on Butterfly Reflections Ink Bog today...why is it fabulous..?
Because tomorrow is my birthday and the inspiration for this post!
 
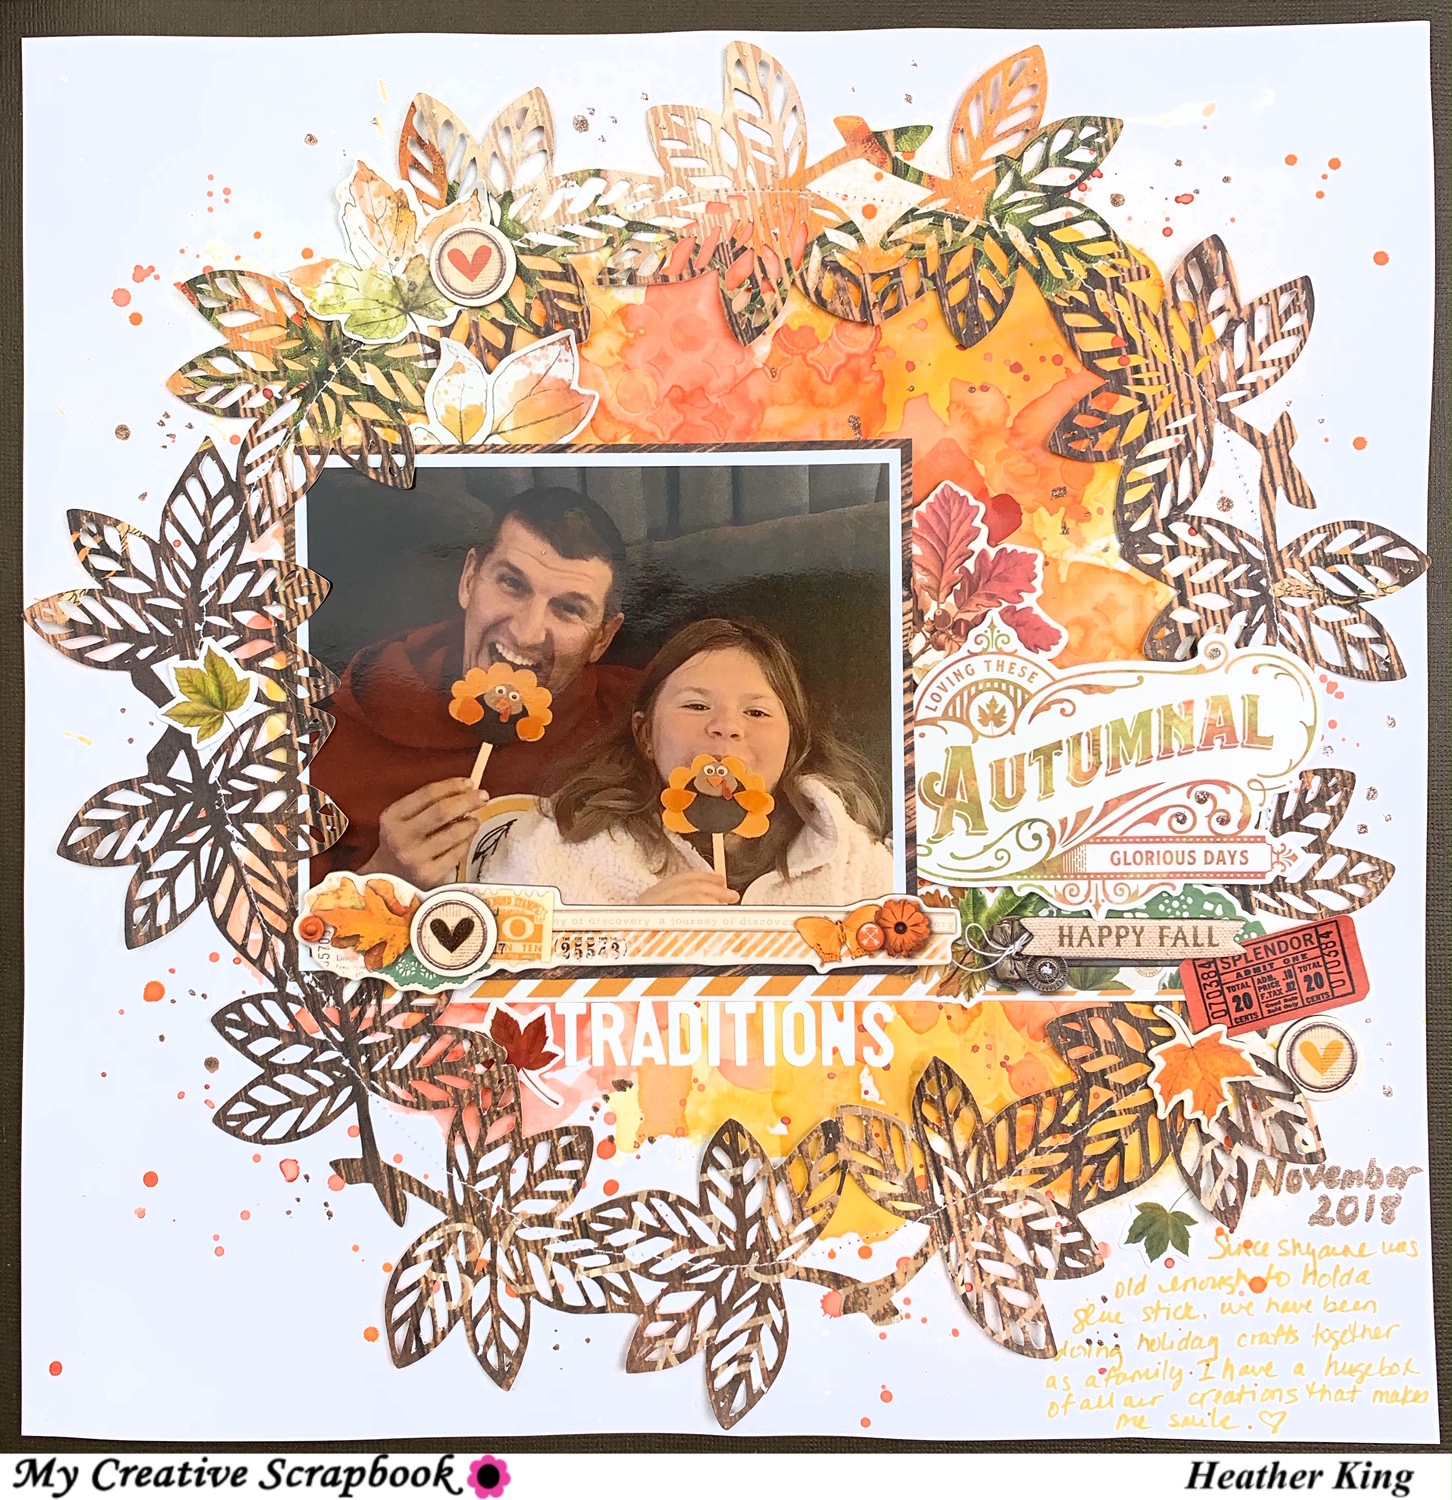
I started thinking of my 38 years and all of the beautiful moments as well as the things that make my soul happy...(yes, one of them is crafting..any kind of crafting of course). 
This led me on a path down crafty memory lane...all of the things I have learned over the years, including happy mistakes, the joy I get by creating something new, and lastly, all of the different personal looks I've had in my lifetime so far...
So, I got to thinking....with one background die, how many looks can I create with this one die..?
 
Now, let me start with a disclaimer...most who know me know that I am a crafter of all kinds, but my passion is scrapbooking!  However, I love making my own cards and who wants to spend money on them when I can make it myself, am I right??!
That said, I did not invent these techniques and I'm not showing you anything revolutionary, wait-I take that back...yes on the revolutionary, but not my original revolution! 
 
I had a great time nonetheless and figured if nothing else, I would spark some creativity in you with these ideas and maybe inspire you to dust off all of those fun mediums and supplies you haven't played with in a while...! now, lets get to it!!
 
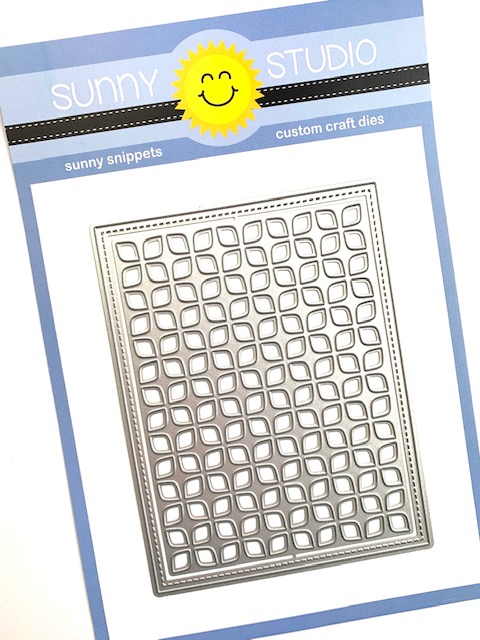
I started with this one background die...
If you don't have this specific background die, you can use any background die to create these looks...check out this link for other options......background dies
 
 
Next, I pulled out glitters, embossing paste/powder, inks, and all sorts of goodies!
The first few are the most obvious looks, but just as important I think....
 
1. Shaker card....because shakers are always so fun!!
For this card, I cut the background die in glitter paper and created my shaker with some bits and pieces from Trinity Stamps and my stash.  Here are some other options for shaker fillers.... shaker filler options
The sentiment was created with the Altenew Happy die and the Honey Bees Sending You Sentiments Stamp set.
 
2. Cut in half...you get two cards from one die cut!
I simply cut the die from Altenew gold foil cardstock and cut in half diagonally! To finish up, I added a small strip of red glitter paper and some Pretty Pink Posh Jewels.  The sentiment was stamped with a Ranger Letter It stamp set and heat embossed with versmark ink and  Ranger Gold Tinsel embossing powder.

 
3.  Dry embossed...this had to be the simplest look!
Please refer to your die cutting machine for the proper sandwich, but this look can be done with any die in any shape or style! I used the same Altenew gold foil cardstock for this card.
To finish up, I die cut a heart from vellum and layered a stacked white cardstock sentiment then added Pretty Pink Posh jewels.

 
4. Backed with Glitter paper & 5. Backed with Glitter
I know these two options are so similar, however, you can't get the blending of glitter with paper like you can with actual glitter!
The background with glitter was created with Stick It adhesive sheets on white cardstock and a layered a white Sunny Studios background die cut on top.  Then, I added each color of glitter being sure to layer the next glitter over top the previous to get a blend. 
For best results, fine glitter is suggested.
To make sure the sentiments popped on bright backgrounds, I added a vellum die cut circle or layered a vellum shadow die cut from the Honey Bees Thank you die set.
To give the sentiments dimension and shine, I used a Nuvo shimmer pen plus Nuvo crystal glaze. There are more for just enamel dots!!
I also used more Pretty Pink Posh jewels.
The second look is a cardstock die cut over glitter paper.


6. Watercolor-stain glass background vs. 7.Copic colored background 
The landscape card was created with my Zig Clean Color watercolor markers.  I layered one white die cut on my base so I knew where to color, then I layered three more white die cuts on top.  This made it easy to add in Nuvo Crystal Glaze to create a stained glass look.
The portrait card was created the same way, but with Copic markers.  Then, I added Nuvo clear crystal drops, but it did not give me the dimension and shine like the crystal glaze did.
I layered both of the sentiments on vellum to make them stand out.
For finishing touches, I added Pretty Pink Posh jewels and Doodlebug mini pearls


8. Stencil & Spray Ink background
I cut the die on scratch cardstock to use a stencil on a piece of white cardstock base with Distress Oxide spray inks.  Be aware, using cardstock as a stencil does not always provide clean results...if you don't like the look of it seeping underneath, then you could use Pixie spray with your stencil.
To finish up, I heat embossed a sentiment on vellum  Wow Metallic Platinum Sparkle embossing powder and attached on each end of the card to avoid adding adhesive and seen through the vellum.
To finish up, I added some Pretty Pink Posh sequins.

 
9. Stencil & Ink Blended background vs. 10. Ink Blended die cut
Ok...so these two looks are similar to the one above, but much more controlled!! less mess, and more control over the finished color!
The card on the left, I blended the Distress Oxide ink pads, then layered a silver shimmer cardstock die cut on top. 
The card on the right, I blended Distress Oxide inks, then cut with the background die, then layered on a white cardstock base.
Again, to make sure the sentiments pop off the background, I added a layer of vellum in a strip or a circle.  I used the same Wow Platinum Sparkle Embossing powder.
Lastly, I used some Doodlebug mini pearls.


11. Heat Embossed die cut
To create this look, I die cut cardstock and heat embossed using Wow Metallic platinum Sparkle embossing powder and versamark ink.  The Happy Birthday sentiment is with stacked back cardstock then covered with Nuvo Shimmer pen and Nuvo crystal glaze for dimension.
I also layered a die cut vellum heart underneath to make it stand out from the background.

Lastly, I used some Doodlebug mini pearls.
 
12. Heat Embossed background & 13. Embossing paste background
To create the first look, I die cut cardstock for a stencil to add versmark ink and heat embossed using Wow Primary Bluetiful embossing powder.  The sentiments were also heat embossed using Wow Metallic Platinum Sparkle embossing powder on a vellum strip.
The second look was created with the same stencil and Vicki Boutin Rose Gold Glaze. 
I did add another white die cut over the Rose Gold Glaze to clean up the edges.  Paper stencils don't always provide clean results.
For finishing touches, I added Pretty Pink Posh Rose Gold sequins and Lucy's Cards Shimmering Pool Chunky Jewels.


14. Texture Paste background  & 15. Texture Paste Smoosh background
To create the first look, I die cut cardstock for a stencil to add Sparkly white texture paste.  Then I added a stacked die cut sentiment from Altenew Gold Foil cardstock layered on a white ribbon.
The second look was created by adding a very thick of teal texture paste, then pressing a silver shimmer die cut in to it in order for the texture paste to rise up.  This adds a ton of dimension and texture and was not meant to look even.


16. Nuvo Drops Stencil background  vs. 17. Stenciled Nuvo Drops background
Last, but definitely not least!! I  wasn't sure I'd like them , but have to admit these are my favorites!
I die cut white cardstock piece to use a stencil with Nuvo spatula & Nuvo Drops..yes, I know, don't freak out...I really didn't use that much, promise!! I didn't intend on using the stencil, but when I was done, I loved it just as much! I used Autumn Red English Mustard, & Ripened Pumpkin.
 I added it to my cardstock base with a vellum strip with my heat embossed sentiment. 
The second card is the stenciled Nuvo Drops background and they both scream fall to me!
For finishing touches, I added cardstock Impression Obsession leaf die cuts along with some gold glitter glue and Doodlebug mini pearls.
 
 
If you made it this far...thanks for sticking with me!!
This project was definitely a labor of love, but I am happy with all of the finished cards....what do you think?? what is your favorite card? or favorite technique?
 
If you have any questions about these techniques or products used, please leave me a comment below.   Have a
spooky week!
xoxo, Heather


Monday, September 30, 2019

My Creative Scrapbook Kit Club - September Main Kit Layout Share

 
Happy Fall Y'all!  Yeah, how many times do you hear that a season?? :)
Well, I love fall...it is my absolute fave time of year and I am looking forward to crisp air, pumpkin lattes, and fall scrapbooking!!
Ok...so these don't have pumpkins or leaves, but it is still September's main kit from My Creative Scrapbook Kit Club and even though I didn't create fall layouts, doesn't mean this kit couldn't be used for your fall layouts! 
Make sure you head over to the MCS website and check out the new kits!
Below are the layouts I created with this months kit as well as a couple of process videos posted on my YouTube channel.  Thanks so much for stop by!


exclusive September cut file


exclusive September cut file


Sunday, September 1, 2019

My Creative Scrapbook August Main Kit Layout share


Thanks so much for checking out my projects using the main kit from My Creative Scrapbook Kit Club!


Exclusive cutfile designed by Paige Evans for MCS subscribers


Exclusive cutfile designed by
The Cut Shoppe for MCS
subscribers


Wednesday, August 7, 2019

My Creative Scrapbook Kit Club// July Main kit round up

 
Thanks for stopping by! 
These are just some the projects I created with the July main kit from My Creative Scrapbook Kit Club.
You can see more of my work on my instagram page.


Monday, July 1, 2019

Scrapbook layout share //My Creative Scrapbook kit club - June Main Kit


Hey crafty friends....I hope your spring has been filled with love and flowers!! 
My spring got jump started with this kit for sure!  The main kit from My Creative Scrapbook was filled with Simple Stories Vintage Botanicals collection that has gorgeous flowers and spring elements!
Below is a snapshot of the contents of this month's main kit and I have a unboxing video on my youtube channel.


<iframe width="560" height="315" src="https://www.youtube.com/embed/VI8t9859Fqw?list=PLhY36DDOYkWP4eo-XzM-ziOzdBDu1YCIg" frameborder="0" allow="accelerometer; autoplay; encrypted-media; gyroscope; picture-in-picture" allowfullscreen></iframe>
 
 
My first layout uses this exclusive cut file from The Cut Shoppe...


You can watch my whole process in this YouTube video..


My second layout has to be my favorite...I used the below exclusive cut file from The Cut Shoppe and altered it to make it work for my layout.

 
You can see how I changed the cut file to fit my design and the rest of my process in this YouTube video.

 
My third layout was a little out of my comfort zone and definitely took some twists and turns....check out my process in this YouTube video.

 
My last layout was super fun to create!  I love making my own backgrounds and incorporated a few stencils and ink sprays to create this grid color block layout.  You can see how this layout came together in this YouTube Video.


Thanks so much for taking a look at my layouts using the My Creative Scrapbook June Main Kit.  I hope you were inspired to try some of these techniques.  I'd love to know what you think...please feel free to leave any comments or questions below.
If you are interested in getting these cut files or the next kit, head over to My Creative Scrapbook!
Have a great week!

Saturday, June 15, 2019

"Lovely" 12x12 Scrapbook layout // Cocoa Vanilla Studio Happiness Collection

Hey friends...I am guest designing over at Butterfly Reflections Ink this month and I am back sharing a layout created with one of my favorite collection lately....Cocoa Vanilla Studios "Happiness Collection
I love this collection...its bright rainbow colors, gorgeous clear stickers, and the oh so pretty embellishments!
 
I started with a white piece of white cardstock as my background and cut a bunch of "spring florals" on my silhouette from Just Nick Studio also from white cardstock.


I backed the flower die cuts with patterned papers from the 6x8 paper pad.  Then, for a little sparkle and shine, I embossed the tips of the flowers with WOW sparkle silver embossing powder using Versamark embossing ink.
 
 
I adhered the flowers vertically just in the centers to keep the petals lifted and popped a few of them up with pop dots.  After matting my photo with a couple of patterned papers, I added stickers from the cardstock stickers and the clear stickers around my photo and layered underneath my large flowers.  I love the clear stickers in this collection...they mimic watercolor patches without breaking out the water!  

 
To embellish the layout, I added some matching butterflies and my title die cut from the ephemera package.  To finish up, I added Nuvo drops and Pretty Pink Posh sequins to the center of a couple of large flowers.

 
 I hope you enjoyed taking a look at my layout!  Thanks for stopping by!  I'd love to know what you think.  Please feel free to leave a comment or questions below. Then, head over to the shop to get your hands on this collection before its gone!
Enjoy your weekend!

Tuesday, June 4, 2019

My Creative Scrapbook Kit Club // May Main Kit scrapbook layouts

 
Hey crafty peeps....I know this post is a little late as we are now in June, but I had some awesome inspiration I wanted to share so here it is....
 
The May Main kit from My Creative Scrapbook Kit Club was packed with Pink Paislee/Paige Evans Horizon collection paired with some fun embellishments!
I do have an unboxing video on my youtube channel if you are interested to see what  I started with.
 
 
I created four layouts starting with the one below using one of the exclusive cut files offered from MCS for free.  I thought it would be fun to back with the rainbow patterned paper from the kit and add some hand stitching with rainbow threads.  It was quite time consuming, but so worth it!  The results are gorgeous!  This is such an easy way to add detail and texture without any skill!
I finished the layout with some splatters, a few matching embellies and a title from the Vicki Boutin sticker alphas from the kit.
 
My second layout was all about those cute little die cuts that look like little store fronts which were perfect for my shopping trip with my daughter and little brother!
I also used an exclusive cut file, but to use as a stencil with texture paste and lots of mixed media!
After the background was dry, it was just a matter of layering those fun die cuts.


My third layout was so much fun to make!  I used lots of exclusive cut files and layered with patterned papers and vellum.  There was a lot going on in this layout, therefore, once I added a few die cut flowers, my title, and a little mixed media on the background, it was good to go!  I love how bright and cheerful it is.


And last, but not least, my fourth layout.  I used all of the chipboard pieces included in the kit and painted them to match this collection.  I knew I wanted to add lots of little "frames" to have embellishments sit in and decided after much debating, to have them cascading down the page from my photo at the top.  You can watch how this layout twisted and turned on my YouTube channel.


Thanks so much for stopping by and I hope you enjoyed these layouts created with the May Main kit!
I'd love to know what you think! Please feel free to leave any comments or questions below!
 For more information on the available kits, head over to My Creative Scrapbook Kit Club to learn how you can have new, beautiful products delivered to your door each month!

Thursday, May 16, 2019

Craft Room Tour :pictures & video ///updated 2019

 
Hey friends!!  I have to apologize for being mia for a bit!  I have been creating, but just have slacked a little on keeping up on my blog posts!  so, I am sorry, but I have some fun stuff to share with you the next couple of weeks so stay tuned....and this post, is all about my updated craft room! 
 
I am so excited with my space and finally feel like it is the perfect space for me to be creative and productive!  The first and last craft room share was in early 2018 at the beginning of my new social media journey and while it was a really nice space, I knew there was room for improvement!  I am beyond grateful to have my own room to craft in after the years and years of crafting at my dining room table and it has even take 6 years of living in our current home to get this room just as I like it...or love it! :)
 
 
This is the view from my door and it makes me smile every time I walk in!
I have a mix of yard sale and throwaway pieces....I am a kitchen designer and every once in awhile, a cabinet or accessory arrives damaged and they are replaced immediately, however, instead of throwing them away, I incorporated them into my craft room.   Kitchen cabinet organization is also perfect for craft room storage!!
 
This fun tassel banner is from an etsy shop called "Tassel Love".  This shop has tassels in all different colors and lengths and they are gorgeous!


This cart is from Michaels and holds all of the tools and essentials I use on a daily basis.  I love that it is on wheels and I can move it when I need to access my closet.  My closet has materials and projects I don't use often.  
 
 
This wall is very precious to me!  I was lucky to have my first layout published in Creative Scrapbooker Magazine in the fall of 2018 and then three more in their winter issue.  In 2019 I have had two more published and one expected to go to print in a couple of months so my frames are already almost filled up!  I am so thrilled to have my work printed to share and love seeing them on my wall next to my work space. 

This wall is on the left when you walk in and the units on the ends are just bookshelves you put together at home so they aren't the sturdiness, but they work for me and hold a ton of my stuff!  I love using matching bins to organize my materials and tools.  For instance, my stamps, dies, sequins, flowers, and list goes on!


This section of my wall has cabinet drawer organizers that I backed with patterned paper and then used them to store all my glitters and nuvo drops.  My husband also installed a small shelf underneath so I could set my little embellishment jars on it.  I like the look of the jars and being able to see everything.
 
You can see a lot more in my video share on my youtube channel, but somehow I missed opening this one drawer! hahaha....this is where I store all of my embossing powders, perfect pearls powders, embroidery floss and a few other items.

 
I really hope you liked the tour through my happy craft space and make sure you check out my youtube video tour for more details!
 
Have a great day!!

December Kit share - My Creative Scrapbook Kit Club/main Kit

Hey my friends....Happy new year!! I realize this post is a little late, but I have been spending time with my family and working on new co...