
Hi crafty friends...I am back with another project to share of my sweet little lady on Easter.
This is my fourth design team project for Butterfly Reflections Ink!
This is my fourth design team project for Butterfly Reflections Ink!
I have been playing with the "Adore You" and "Beautiful Day" stamp sets from Altenew for some time now and I love these flowers! It is also helpful to have the matching dies especially when stamping and cutting a field full of flowers. These images aren't too difficult to fussy cut, but I am not a fan!
You can find the "Adore You" stamps and matching dies in a set in the store...and if you prefer a different look, there are so many Altenew stamps available in the shop that can also be used to create this look.
In order to create this rainbow of flowers, I started with watercolor paper and distress inks from Tim Holtz and got to smooshing. If you haven't seen this done before, I "smoosh" the ink pads on my craft mat, spray some water, then run the watercolor paper through the ink. I love this technique and makes it appear that I am a master at watercoloring, but that couldn't be farther from the truth...anyone can get these results!
It is soo much fun and a little therapeutic!

When I started playing with inks, I didn't necessarily plan out how much of each color, I just knew I wanted lots of it!

After, I created several colorful panels, I started stamping flowers and leaves from the "Adore You" stamp set in Archival black ink....you do not need a Misti for this, but it is definitely helpful! It makes for quick stamping of multiple images at once.
I used Archival ink for all of the stamping on this layout because it is bold and permanent.

To create a lot of dimension, I adhered most of my flower die cuts with foam adhesive...some placed in the center of the flowers, but also on the edges, so I could tuck in one side and pop up the other...I love the way this turned out!

I had planned to stamp a few images from the "Beautiful Day" set on my background, but I was a little nervous to mess it up! The next best thing is to stamp on vellum...It provides a subtle texture and wont ruin your background if you mess up. I die cut the stamped images from the matching "Beautiful Day" die set and tucked them in under the other flowers.
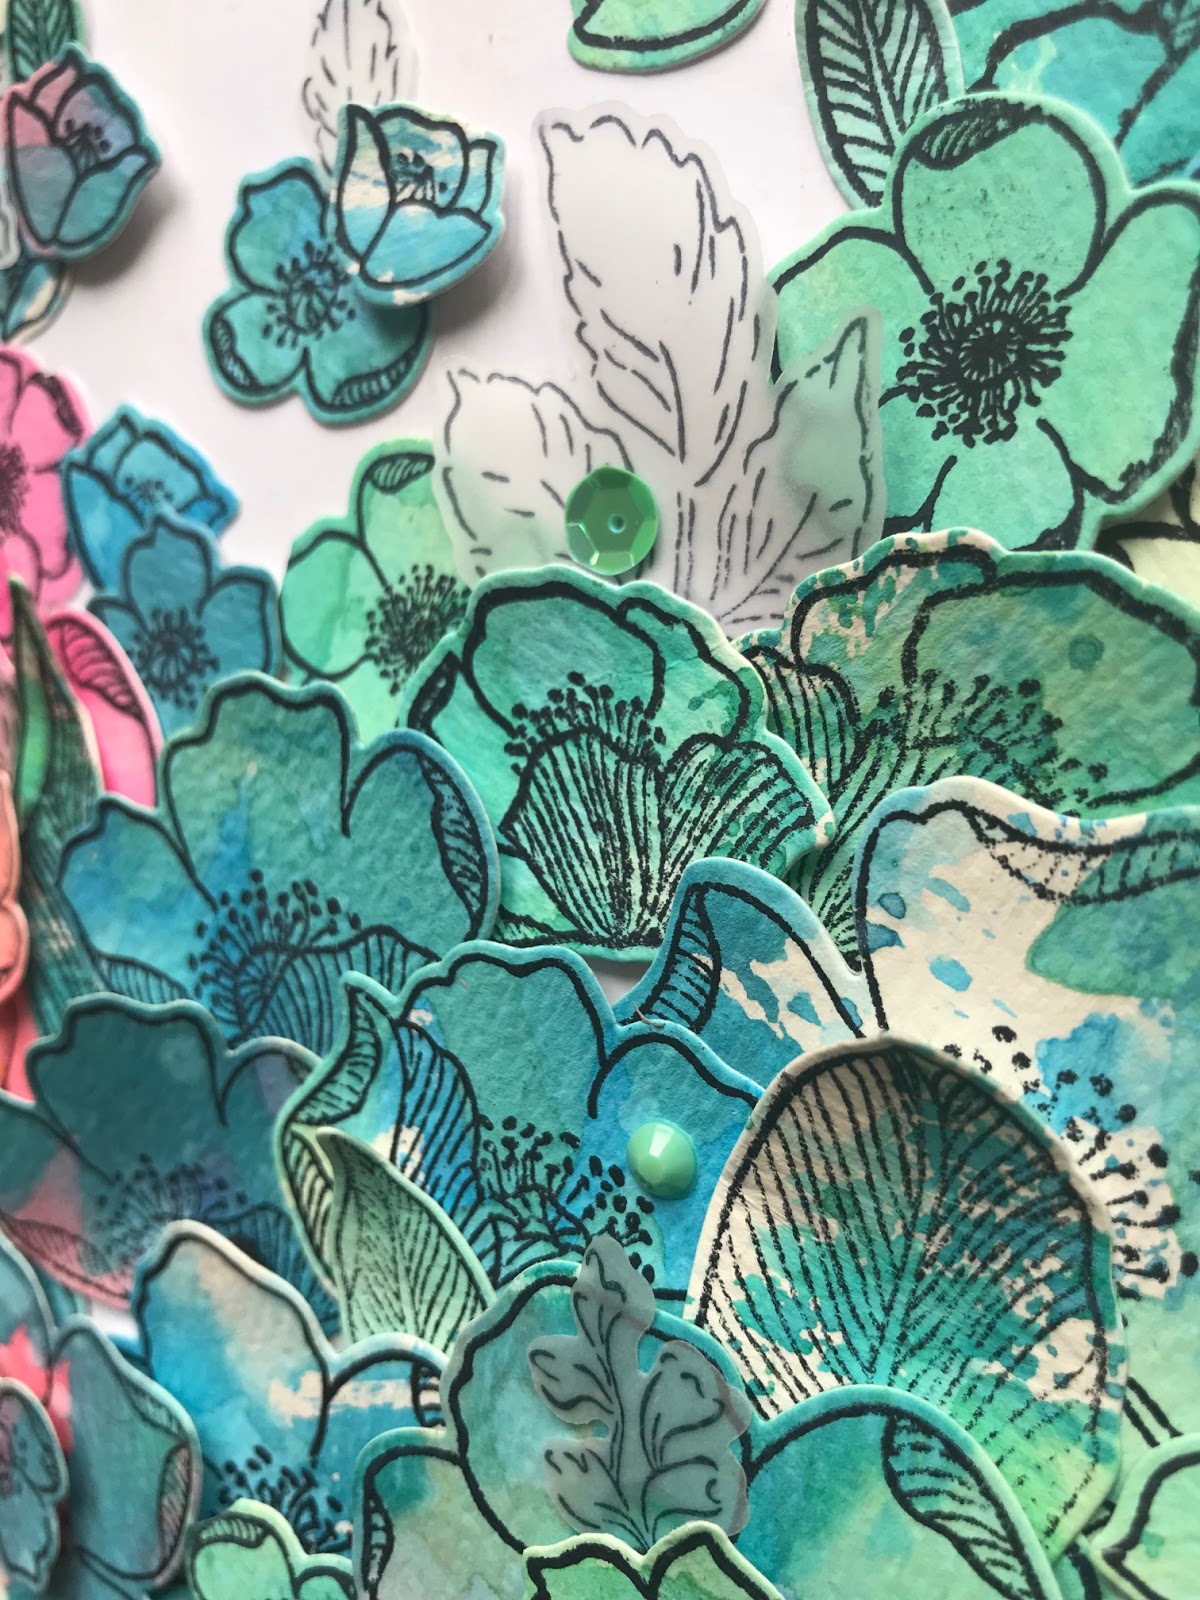
To give more texture and bling, I added jewels and sequins scattered about from Pretty Pink Posh.

For my title, I used sentiments from the "Adore You" set which was perfect for how I was feeling when I took this photo.

To finish up, I splattered some color with Heidi Swapp Color Shine from my stash.
I hope you are inspired to try this technique Altenew stamps and dies that you can find over at Butterfly Reflections Ink shop.... They are se versatile and create stunning embellishments!
Thanks so much for stopping by! I'd love to know what you think.
Please feel free to comment below... If you'd like to see my entire process, check out my video on YouTube linked below....
Have a great week!


No comments:
Post a Comment