Monday, June 25, 2018

"You are loved" scrapbook layout //Butterfly Reflections Ink DT

Hello crafty friends...I am back to share another scrapbook layout using stamps and dies from Wplus9 and Altenew!
Actually, there are several different brands incorporated in this project!. so many lovely products to choose from!  This is of a my picture of me and my little girl while enjoying a day at the park.
 
My inspiration for this page actually started with the rose gold embossing powders Vanessa shared on the Butterfly Reflections Ink Instagram feed a little while back....I loved the way the Avery Elle Rose Gold Metallic Embossing Powder looked so I ordered it and definitely wanted to use it on my next project.
The frame around my photo was cut from the Scalloped squares die set from Pretty Pink Posh.
 
I started with a white piece of white cardstock and added a layer of  clear gesso because I knew I wanted to add some mixed media.
 I used the Geometric Heart Stencil from Echo Park and Distress Crayons to add the subtle hearts on the background.  The Tim Holtz distress retractable brush create a softer look that you can build up whereas the Tim Holtz Ink blending tools add more ink and sometimes they get caught on the stencil when applying in the circular motion. Then, I added some splatters in the same colors
 
The title of this page was created with the Altenew  "You are loved" die and embossed with the Avery Elle Rose Gold.  I embossed it two times in order to get the smooth finish.  I love the color of this, however, it made it very difficult to match...I did not have anything in my stash that really matched well, therefore, creating my own embellishments was the best way to go. 
 
 
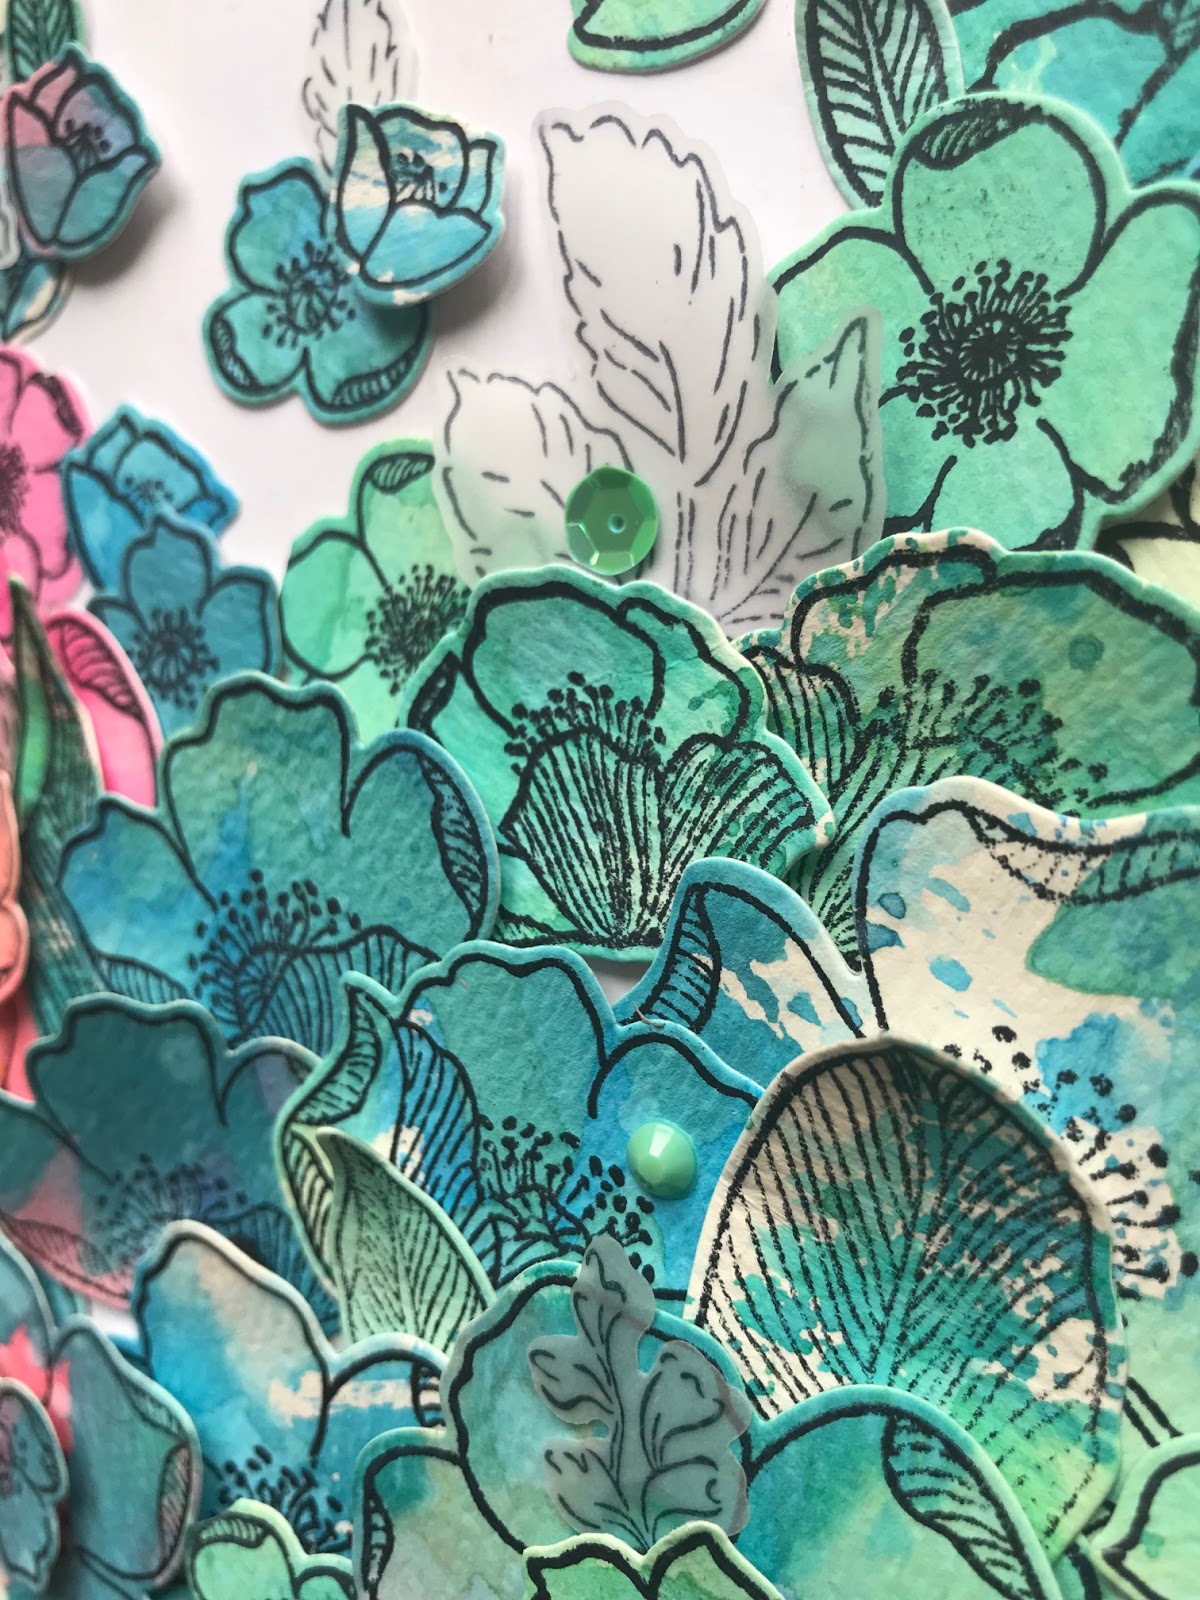
I used the Wplus9 Pretty Little Peonies stamp set and coordinating die set from to stamp all of these beautiful flowers.  This stamp set has 2 to 3 layering images for each flower and leaf and what I love about this set is there are so many images and few really small images.  The flowers were stamped with Altenew Peach Perfect Crisp Dye Ink as my lightest color, then used Hero Arts Soft Cantaloupe and Fresh Peach as my darker color inks.  The tiny images meant for the center of the flowers were stamped with versamark ink and embossed with the same rose gold embossing powder.  The leaves were stamped with Distress Oxide Cracked Pistachio and Hero Arts Mint Julep.
 
 
 Once all of the flowers and leaves were cut, I scattered them about the page.  To balance the layout, I tore a section at the top and bottom and ripped it up some so I could layer a piece of patterned paper from Pink Paislee Paige Evan Take Me Away 6 x 6 paper pad under the tear.  I used my tiny attacher to staple the fold.  This little tear and fold in the cardstock provided a convenient place to tuck in more little flowers and leaves.
 
 
To finish up, I scattered Pretty Pink Posh clear sparkling sequins around the page and a couple of strips of washi tape from my stash.
Thanks so much for stopping by!  I hope you are inspired to create your own embellishments with flower stamps and dies and head over to the Butterfly Reflections Ink online shop to see all of the gorgeous choices to shop from!
If you'd like to watch my whole process, check out my YouTube video linked below...
Have a great week! 

Thursday, June 21, 2018

"Magical" scrapbook layout/Butterfly Reflections Ink DT //Doodlebug Designs Fairy Tales

Hi, crafty friends....I am back to share a "magical" scrapbook layout featuring Doodlebug Designs "Fairy Tales" collection and Reverse Confetti die set. 
The picture is of my daughter and her friends at her 10th birthday unicorn party.  My husband built a lemonade stand last summer and we turned it into a photo booth for her and her friends to have fun with.   So, when I saw this collection, I knew it would be perfect for my photos from the party!


I started with a piece of white cardstock and created a messy mixed media background using Distress Oxide Inks.  This tried and true technique is so simple and easy, it is definitely my go to when I use white cardstock.
I used Picked Raspberry, Broken China, and Seedless Preserves.  These colors match Doodlebug patterns so well!. To create some texture, I used a stencil from Echo Park called Geometric Heart and texture paste from Dreamweavers.  This texture paste is one of my favorites because it is translucent.  Which means it dries clear and picks up the color beneath it. It is a subtle detail, but adds just enough texture behind my main design elements.
 
 The idea of making banners popped in my head after I opened the Odds & Ends pack of embellishments.  There are a few banner die cuts included, but I wanted to create several banners and thought the Heart Banner Confetti Cuts die set from Reverse Confetti was perfect!  They are so cute and versatile!  They can be stacked together or used alone which is what I did....a couple of the dies also cut little hearts in the center which allows the color on my background to peek through! I cut about four dozen of the banner pieces from the Fairy Tales 6x6 paper pad.


After arranging the die cuts in every possible way, I decided on (4) rows just straight across and temporarily with adhesive so I could stitch them down with my sewing machine.  I liked the idea of bending the up the banners for dimension.  I added an iridescent crystal from Studio Katia to each tiny hole on either side of the banner die cuts which act as sort of the "pins" holding my banners up. Plus, they are so sparkly!
 
 
For my title, I pulled one of the large word die cuts from the same Odds & Ends embellishment pack and placed one of the phrases underneath from one of the cut apart papers from the 6 x 6 paper pad. 
 
 
I really wanted to use one on the cute paper clips from Shimelle Glitter Girl but they didn't fit right due to the direction the unicorns were facing in, so, I took a breath, and pulled the paper clip off!  I know...very scary, but it came off easy enough and then I was able to place the unicorn over my title on top of a bed of blue thread from my stash.


To finish up, I added clear sequins from Pretty Pink Posh and Bella Blvd puffy stars  and Freckled Fawn scattered about the page.
For even more sparkle....I broke out my Nuvo shimmer pen and went shimmer crazy! on my title, die cut hearts, presents...can't have enough sparkly goodness when they are unicorns involved! 
Thanks so much for stopping by...I hope you like what you see and are inspired to pull out a die set to make your own embellishments!  Head over to the online store and take a look at what Reverse Confetti has to offer and pick up some of the adorable Fairy Tales Collection from Doodlebug Designs too!
To watch my whole process, check out my YouTube video linked below...
 
Please feel free to leave a comment or question...I'd love to know what you think!
Have a great week!


Wednesday, June 6, 2018

"You are my home" Scrapbook layout // Butterfly Reflections Ink DT


Happy hump day! I am back with another 12 x 12 scrapbook layout for Butterfly Reflections Ink using Doodlebug designs "Hello" collection and Paige Evans rolled flower cut files
I love all of the colors in this collection and the "home" theme it provides. 
I started by spreading a layer of clear gesso on a piece of white cardstock, then "smooshed" some ink to my background with Distress Inks.  I used Worn Lipstick, Picked Raspberry, Salty Ocean, Peacock Feathers, & Broken China.  Once dry, I splattered the same ink all around with a small paint brush.
For the design of my layout I actually had quite a hard time deciding what to do...so many ideas!  I knew I wanted to use these gorgeous flower cut files .  The flowers are cut from about 6x6 papers and rolled up...This was the first time I created these flowers and they didn't turn out as I had hoped, but I love the finished look.  If rolled tight enough, there shouldn't be any gaps, but this was definitely a learning experience for me! You will see below how I made it look intentional! :)  These flowers create so much dimension especially if the "petals" are folded and curled to make them look more realistic.
 
 
After a few different ideas, I decided on a wreath shape which goes well with the "home" theme.  Because some of the flowers ended up with large gaps in the center, I pulled out some sequins, gems, and glitter.  I put a dollop of glossy accents in the center, then filled in the center with sparkly things.  Some with glitter from my stash and some with sequins and gems from Pretty Pink Posh. 
 
 
To add texture and gold to match the embellishments, I added some hearts and leaves foam stickers from Pink Paislee's Take Me Away Thickers.
 
 
I tucked in matching house and flower die cuts from Doodlebug Designs "Hello" Odds and Ends package ...you can never have too many flowers! and hearts...
 
 
The cute little matching enamel stickers are the perfect finishing touch.  The tiny hearts are from the Doodlebug Tiny Heart Shape Sprinkles and the little bow on my house is from the Hello Shape Sprinkles.


The two sweet little butterflies are also from the Odds and Ends die cuts.


I tucked these beautiful large flowers and clear flower die cuts under my photo and popped up some with adhesive foam. 

 
The house die cut was the inspiration for my title and used foam thickers from my stash in dark blue which matches this collection perfectly!  If you don't have these, you could use any white alphas and paint/ink them to match.   The foam alphas worked for me because they were small enough to fit in my wreath.

 
Thanks so much for stopping by!  I hope this inspires you to add lots of flowers to your next project!  Check out the Butterfly Reflections Ink online store for these Doodlebug Designs products and so much more!  I'd love to know what you think of my project.  Please feel free to leave a comment or any questions. 
If you'd like to see my YouTube video, check out the link below...
https://youtu.be/3SLQt4t0_9U

Have a great (crafty) day!


"I adore you" scrapbook layout // Butterfly Reflections Ink DT //Altenew stamps & dies

Hi crafty friends...I am back with another project to share of my sweet little lady on Easter.
This is my fourth design team project for Butterfly Reflections Ink!
I have been playing with the "Adore You" and "Beautiful Day" stamp sets from Altenew for some time now and I love these flowers!  It is also helpful to have the matching dies especially when stamping and cutting a field full of flowers.  These images aren't too difficult to fussy cut, but I am not a fan!  
You can find the "Adore You" stamps and matching dies in a set in the store...and if you prefer a different look, there are so many Altenew stamps available in the shop that can also be used to create this look.
In order to create this rainbow of flowers, I started with watercolor paper and distress inks from Tim Holtz and got to smooshing.  If you haven't seen this done before, I "smoosh" the ink pads on my craft mat, spray some water, then run the watercolor paper through the ink.  I love this technique and makes it appear that I am a master at watercoloring, but that couldn't be farther from the truth...anyone can get these results!
It is soo much fun and a little therapeutic!
 
When I started playing with inks, I didn't necessarily plan out how much of each color, I just knew I wanted lots of it!
 
 
After, I created several colorful panels, I started stamping flowers and leaves from the "Adore You" stamp set in Archival black ink....you do not need a Misti for this, but it is definitely helpful!  It makes for quick stamping of multiple images at once.
I used Archival ink for all of the stamping on this layout because it is bold and permanent.

 
To create a lot of dimension, I adhered most of my flower die cuts with foam adhesive...some placed in the center of the flowers, but also on the edges, so I could tuck in one side and pop up the other...I love the way this turned out!
 

I had planned to stamp a few images from the "Beautiful Day" set on my background, but I was a little nervous to mess it up!  The next best thing is to stamp on vellum...It provides a subtle texture and wont ruin your background if you mess up.  I die cut the stamped images from the matching "Beautiful Day" die set and tucked them in under the other flowers.


To give more texture and bling, I added jewels and sequins scattered about from Pretty Pink Posh.

 
For my title, I used sentiments from the "Adore You" set which was perfect for how I was feeling when I took this photo.


To finish up, I splattered some color with Heidi Swapp Color Shine from my stash. 
I hope you are inspired to try this technique Altenew stamps and dies that you can find over at Butterfly Reflections Ink shop.... They are se versatile and create stunning embellishments!
Thanks so much for stopping by!  I'd love to know what you think. 
Please feel free to comment below... If you'd like to see my entire process, check out my video on YouTube linked below....
 
Have a great week!

Tuesday, June 5, 2018

"#Adorbs" scrapbook layout //DT for Butterfly Reflections Ink //Doodlebug Designs

Hello friends! 
I have another 12 x 12 layout featuring Doodlebug Designs Hello collection. This is my second project for the Butterfly Reflections Ink design tea...YAY!
With so many beautiful pieces to work with, it is hard to narrow them down to use...I knew I wanted to use flowers and thought I would include the flowers from the collection, but with so many gorgeous patterns from the 6x6 paper pad, I decided to use the scraps I already had to back the flowers I cut on my Silhouette Cameo in white cardstock.   6x6 paper pads are perfect for backing cut files because the patterns are smaller...
This layout is of my daughter and husband at the park and it is not often that my daughter willingly allows me to take her picture so I was pleasantly surprised when she agreed to these while we were at the park....and they came out wonderful!


 To create my background, I used colors from the Prima Oil Pastels and smooshed it with some plastic packaging.  I wanted the color to peek through the large heart I also cut on my Silhouette.  To give it some texture, I hand stitched the border of the heart with some white thread.  I layered my photo with a couple of the patterned papers from the 6x6 paper pad and popped it up on some fun foam.

 The title #adorbs is from the Hello chit chat embellishment pack which was perfect! 
I added some of the sweet little hearts from Doodlebug heart sprinkles to the center of the flowers which added the perfect finishing touch! 
Since there was white space on the top left of my photo, I added one of the speech bubbles from the same chit chat package and layered some hearts from the Hello Odds & Ends pack.  
 
I created two clusters of the cut file flowers backed with patterned papers to the top left of the heart and under my photo for balance.  I only glued the center of the flowers in order to allow the petals of the flowers to lift for more dimension then tucked in some of the leaves.
 I love that the leaves have gold foil as does some of the flowers and other embellishments included in this collection.
 
I hope you enjoyed the pictures of my layout and are inspired to check out this collection over at Butterfly Reflections Ink!  There are so many cute pieces in this collection!
Please feel free to leave a comment and let me know what you think!
Thanks for sticking with me to the end of this post and I will be back soon with another project! If you'd like to se my whole process, check out my video on YouTube linked below...


Tuesday, May 29, 2018

"Me & You" scrapbook layout //DTfor Butterfly Reflections Ink //Doodlebug Designs

Hi crafty friends! I hope you are having a great week and had time to play with some paper today!  I have been so busy and unfortunately, means I have been behind on posting here....I don't mean to neglect you all.....I have projects to share and will be busting them all out soon! I appreciate your patience and loyalty!
This layout is my 3rd design team project for Butterfly Reflections Ink.  If you missed my announcement post...I have been given the honor to be a part of their summer design team and I am super excited!!
Without further ado....this layout is all about the Hello collection from Doodlebug Designs.   After three layouts, I have so much product left for probably another few layouts!  This layout is of my daughter and husband out on a "daddy-daughter date"...so sweet!
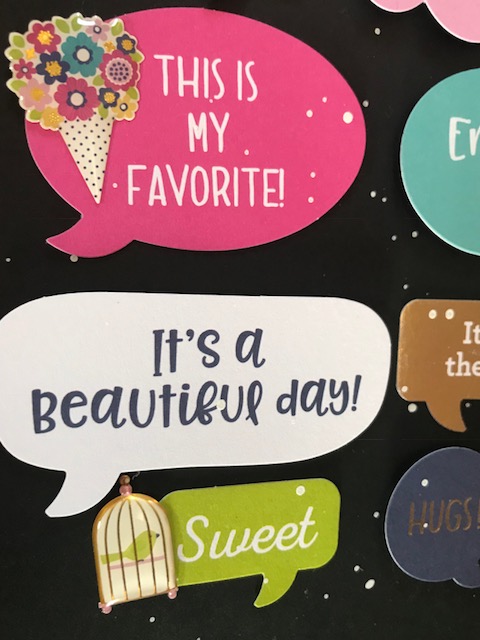
This layout came together so much quicker than normal , but it was easy when I had all of these adorable speech bubbles from the Hello Collection chit chat package.  I couldn't narrow down the ones I wanted to use because they all had such cute messages...so I add them all!
I started with a 12 x 12 piece of black cardstock and started laying down the speech bubbles I wanted to use...spacing them out like a puzzle.  I have been reaching for a lot of black cardstock lately because I love the way the bright colors look against the dark background...Once I had them placed the way I wanted, I glued them down and every other, or just about, I popped up on fun foam.
I even added some of the cute little enamel shapes from the Hello shape sprinkles to some of the speech bubbles to add some texture against all of the paper pieces.
I layered a few of the matching heart die cuts from the same chit chat package plus the itty bitty enamel hearts from Doodlebug tiny little hearts shapes...I love these....they are too cute!  However, because they are so small, I have found using tweezers to place them makes it so much easier!
 To create my title, I used one of the awesome large phrases from the chit chat package which are perfect for any title...I used the "Me & You" die cut...well because it said it all...and to complete my title, I added tiny alpha stickers from Webster's pages.
Lastly, I added some splatters with my Prima Oil pastels for a little bit of messiness and wrote my journaling with a white gel pen.
 
I hope you liked this layout and are inspired to check out the Doodlebug Designs products over at Butterfly Reflections Ink online store!  Thanks so much for stopping by!
Have a great week!
 

Thursday, May 17, 2018

"Memories" scrapbook layout Created for Butterfly Reflections Ink

Happy Saturday, crafty friends!
It's Heather and I am so excited to be sharing my first Butterfly Reflections Ink. design team project with you!
When I came across the Hello collection from Doodlebug, I knew it was just perfect for the photos I had of my mother celebrating her most recent birthday...(no, mom, I won't tell everyone how old you are!)
 
I usually scrap with just one photo, but I couldn't possible choose between these...she just looks so happy! so, I decided a grid format was the best way to go...that is the easiest way to get in more of the beautiful patterned papers, plus I was able to sneak in one of the large chipboard words from Dear Lizzy.  I thought when I received those I would be painting them in some way...but I love the way the white title looked against all of the colors in this layout, so I left it!


I started with a piece of American crafts white cardstock....at this time, Butterfly Reflections Ink does not offer 12x12 papers, but what goes on that piece of cardstock is soo much more important...you can get the background anywhere...its the layers and embellishments that make a layout awesome!!
 
After adding a layer of clear gesso, I used some of my Tim Holtz distress inks to create my colorful background by "smooshing" the ink with some plastic packaging...so easy to do...anyone can be an artist with this technique!
 
 
Next, I matted each photo with a couple of pretty papers from the 6 x 6 paper pad as well as pulled papers to create the other sections of the grid design....these will house my journaling and lots of gorgeous embellishments!  There were so many pieces included to work with, I had a hard time deciding which to use...so I layered several together and popped some up for dimension! I even used the teeny tiny enamel bow for my itty bitty birdhouse from the shape sprinkles.  They are too cute!!


Once I had all of the papers layered as I wanted them, I added some foam adhesive to my photos and some messy stitching to some of the papers with my sewing machine for texture.  I also used a border punch from my stash....yes, I said punch!!  The notebook edge style punch is one of my favorites and I like to pull them out once in a while...you will also notice some pink and blur thread peeking out behind some of the clusters....I like the texture and pops of color thread adds...


I loved all of the flowers included in the Odds and End's embellishment pack!  I decided for on my sections, I would layer a bunch with some popped up on foam adhesive...I love the way it turned out!! 
This section I stitched in a way so that it would open and I could add my journaling ...I am not a big fan of journaling....but yes, I am a scrapbooker...I know odd, right?...but I also tend to write crooked or miss a word...so I love finding ways to add it so it is concealed and it doesn't distract from the rest of the page....if you don't have a sewing machine, you could create this same detail with washi tape, or you could just score a folding line on the top of the patterned paper...


You will notice some of the adorable little tiny heart sprinkles and sparkly sequins from Pretty Pink Posh ...
Thanks so much for sticking with me through this long post, but there are so many gorgeous details in this collection that I had to share!  You can also check out my process on my YouTube channel linked below....
 
  I hope you found some inspiration of your own and will check out the store over at Butterfly Reflections Ink....I am sure you will find a ton that you fall in love with ! Have a great weekend! 

Monday, May 7, 2018

Butterfly Reflections Ink. Design Team! ***I am a Butterfly Ink-er!***


Happy Monday!! and it is certainly a happy Monday for me!
I recently was informed that I had been selected to be a part of the design team for
Butterfly Reflections Ink.  It is an online store featuring stamps, die, and scrapbooking supplies! 
I am very excited for this opportunity and to share this company with you!  The customer is excellent and Vanessa, the owner is a pleasure to work with.    She has also just opened up her first brick and mortar shop in her home town of New Hampshire!  I wish I was local so I could shop in store, but the next best thing is her online store!  However, if you are in her area, you definitely have to make a trip...I mean, who doesn't love shopping for craft supplies in person!!
 
 
If you haven't already shopped there, please check out the store linked above to check out all of the latest and greatest the crafting community has to offer!  Happy Shopping!!
 
Stay tuned for my first design team project coming soon!


Tuesday, April 24, 2018

Scrapbook Layout "Create Something Beautiful" for CSI April challenge

 
Hi, friends....I have another layout to share with you...it is of my dream and very own craft space!  We moved four years ago and at our first house, I had all of my stash in my living room and had to create at my dining room table...I know that many are forced to do that, but it was not preferable!!  I was so happy when we moved to our current house and I had my very own room with a door!!
 
This layout came together from so many inspirations...one being my love for my creative space and another from the case file #252 from CSI: color, stories, inspiration.... you can check out their blog for more details, but the clues in the case that spoke to me was primarily the image of the rooms and one of the testimony journaling prompts was to document something about my home....Since I have been holding on the idea of creating a layout to document my craft room for so long, I thought this was the perfect time to get it done!
Below is the image included on the CSI blog case file details....
 
I know the colors in my layout don't match the case file color scheme exactly, but I loved the contrast of the black and white against the yellow and once I started added color, I couldn't stop with just yellow....
 
I started with a small polka dot patterned paper from Dear Lizzy and ripped the back of the paper to add the strips to the bottom and top of the layout.
I layered my photo with some journaling cards from  my stash and centered in the page.
I added a layer of clear gesso and smooshed some ink from Shimmerz and Heidi Swapp to the four corners. Plus, I splattered the same inks.
Then, fussy cut these beautiful flowers from an Amy Tan patterned paper to layer in a row on the top and bottom.
 
I added color coordinating flair to each corner of the page....
 
 I used small letter stickers from Paige Evans sticker book to note the year we moved in and my craft space was created! The yellow flair button is from Cuts2Luv.

 The title of my page is a sticker from Pink Paislee.
 I added my journaling to a tag and then tucked it under my photo and layers then added some twine. Plus, I had been holding on the little scissors sticker from Tim Holtz for so long and this was the perfect page to add it too!!  This flair button is also from Cuts2Luv.
 This flair is also from Cuts2Luv.
 
Thanks so much for stopping by! I hope you liked my project and found some inspiration.
Check out the CSI blog for more challenges and decide to try and solve your own case too! 
I did not create a process video for this layout, but if you have any questions, please let me know and I will get back to you as soon as possible!
 Have a great day.


December Kit share - My Creative Scrapbook Kit Club/main Kit

Hey my friends....Happy new year!! I realize this post is a little late, but I have been spending time with my family and working on new co...